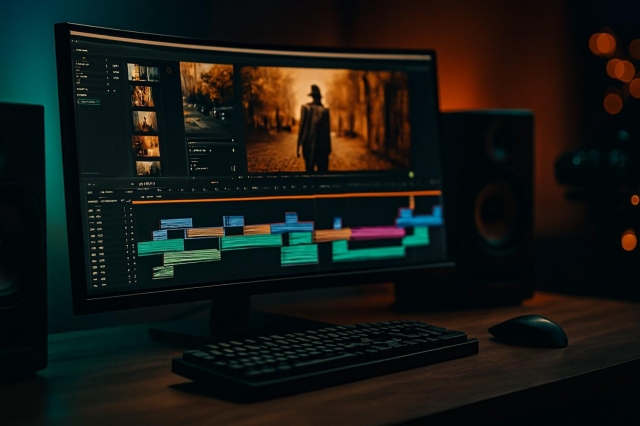
You've captured incredible footage, breathtaking drone shots, intimate interview moments, dynamic action sequences—but the raw files sitting on your hard drive tell an incomplete story. The transformation from scattered clips to a cohesive, compelling narrative happens in the editing suite, where professional video editing separates amateur content from work that captivates audiences and commands premium rates. Whether you're a content creator building your YouTube empire, a filmmaker crafting your debut short, or an aspiring editor looking to break into the industry, the path to professional-grade editing involves mastering technical skills, developing artistic sensibilities, and building efficient workflows that deliver consistent results. This comprehensive guide walks you through every stage of becoming a proficient video editor—from selecting the right software and hardware to developing storytelling instincts that make your work stand out in an increasingly crowded digital landscape. The journey requires dedication and practice, but the rewards—creative fulfillment, career opportunities, and the ability to shape how stories are told—make it an incredibly worthwhile pursuit.
Essential Software for Professional Video Editing
Adobe Premiere Pro: The Industry Standard
Adobe Premiere Pro dominates professional editing environments for good reason. Its comprehensive toolset handles everything from basic cuts to complex multi-camera projects, while seamless integration with After Effects, Photoshop, and Audition creates a powerful ecosystem for complete post-production workflows. The software's widespread adoption means abundant learning resources, extensive plugin support, and universal project compatibility with other editors and studios.
Premiere Pro's non-linear editing interface provides flexibility that traditional linear systems lack. You can experiment freely, test different edit approaches, and make changes at any stage without destructive consequences. The magnetic timeline helps editors work quickly, while advanced features like proxy workflows enable smooth editing even on moderate hardware when working with 4K or higher resolution footage.
The subscription model ($20.99 monthly for a single app, $54.99 for the Creative Cloud suite) represents an ongoing investment but ensures access to continuous updates, new features, and cloud collaboration tools. For editors serious about professional work, this industry-standard software is worth the investment, opening doors to collaboration opportunities and studio positions that require Premiere proficiency.
DaVinci Resolve: Professional Power at No Cost
DaVinci Resolve has revolutionized accessible professional editing by offering studio-grade capabilities completely free. Originally renowned for color grading (used in countless Hollywood productions), Resolve has evolved into a complete editing solution with powerful cutting tools, Fairlight audio post-production, and Fusion visual effects—all in one application.
The free version includes nearly all features most editors need, making it ideal for beginners and budget-conscious professionals. The paid Studio version ($295 one-time payment) adds collaborative workflows, neural engine AI tools, and advanced effects, but the free version alone surpasses many paid alternatives. This pricing structure eliminates financial barriers to learning professional editing.
Resolve's node-based color grading workflow remains unmatched, providing precision and control that attracts colorists worldwide. For editors wanting to specialize in color work or offer comprehensive post-production services, Resolve's integrated approach eliminates the need for multiple applications and simplifies project management significantly.
Final Cut Pro: Mac-Optimized Performance
Final Cut Pro offers Mac users optimized performance that rivals or exceeds other professional applications. Apple's magnetic timeline revolutionized non-linear editing by eliminating gaps and streamlining the editing process. The software leverages Apple silicon processors extraordinarily well, delivering smooth playback and faster rendering times compared to competitors on equivalent hardware.
Final Cut's library-based organization system differs from traditional project structures but provides powerful media management once you adapt. Background rendering keeps your timeline responsive while you continue editing, and the optimized media creation process balances editing performance with storage efficiency—crucial for laptop editors managing limited drive space.
The $299.99 one-time purchase provides lifetime access to all updates, contrasting favorably with subscription models. For editors invested in Apple's ecosystem, Final Cut Pro integrates beautifully with Motion for motion graphics, Compressor for advanced encoding, and Logic Pro for audio work, creating a cohesive professional suite.
Building Your Professional Editing Workstation
Computer Specifications That Matter
Professional video editing demands substantial computing power, but understanding which specifications actually impact performance prevents overspending on unnecessary features. The processor (CPU) handles most editing operations—look for Intel i7/i9 or AMD Ryzen 7/9 processors with high single-core speeds and multiple cores for background rendering. More cores don't always mean better editing performance; balance core count with clock speed.
RAM directly affects timeline responsiveness and the ability to handle complex projects. Start with 32GB minimum for 1080p editing, 64GB for 4K work, and consider 128GB if working with 6K/8K footage or heavy effects. RAM upgrades provide the most noticeable performance improvements for most editors and should be prioritized over other components when budget-constrained.
Graphics cards (GPU) accelerate effects, color grading, and export times in modern editing software. Nvidia RTX series cards offer excellent support across all major editing applications. For 1080p/4K editing, RTX 3060 or 4060 provides good performance; 4K HDR and 6K/8K work benefits from RTX 3080/4080 or higher. AMD cards work well with DaVinci Resolve but have less universal support across editing applications.
Storage Solutions for Video Editors
Storage strategy dramatically impacts editing efficiency. SSDs (Solid State Drives) are essential for operating system, applications, and active project files due to their fast read/write speeds. NVMe M.2 SSDs offer the best performance—look for drives with sustained write speeds above 2000MB/s. Use 1-2TB SSDs for system and current projects, understanding that video files consume space rapidly.
For footage archives and completed projects, traditional HDDs (Hard Disk Drives) provide cost-effective bulk storage. External RAID arrays offer speed and redundancy, protecting against drive failure that could destroy months of work. Many professionals use a three-tier system: NVMe SSD for active editing, secondary SSD for recent projects, and HDD arrays for long-term archives.
Cloud storage provides additional backup security and enables collaboration with remote teams. Services like Dropbox, Google Drive, or specialized solutions like Frame.io facilitate client review and project sharing. However, cloud storage shouldn't replace local backups—redundant local storage remains essential for protecting your work and business.
Display and Audio Equipment
Color-accurate monitors are crucial for professional work that will be viewed across various devices. IPS panels with wide color gamuts (95%+ sRGB minimum, P3 for HDR work) ensure colors you see while editing match what audiences experience. 4K displays provide screen real estate for complex timelines while offering preview resolution matching modern delivery formats.
Calibration tools like X-Rite ColorChecker or Datacolor SpyderX ensure monitor accuracy over time as displays drift. Professional colorists invest in reference monitors, but most editors achieve excellent results with properly calibrated prosumer displays from brands like BenQ, ASUS ProArt, or Dell UltraSharp. Budget $400-$1,200 for quality color-accurate displays.
Studio headphones or monitors are essential for audio editing and mixing. Closed-back headphones isolate external noise, beneficial in non-treated spaces, while open-back headphones provide more natural sound for critical listening. Studio monitors (speakers) offer accurate audio representation for final mixing but require treated acoustic environments for optimal performance. Start with quality headphones ($150-$400) and upgrade to monitors as skills and workspace develop.
Core Skills Every Professional Editor Must Develop
Technical Proficiency Beyond Basic Cutting
Professional editing requires command over advanced techniques that separate competent editors from exceptional ones. Multicam editing synchronizes footage from multiple cameras, essential for events, interviews, and live performances. Learn to sync clips using audio waveforms or timecode, then cut between angles seamlessly to maintain viewer engagement and optimal shot selection.
Nested sequences organize complex projects by allowing you to edit groups of clips as single elements. This approach simplifies timeline management for projects with recurring elements or complex effects that need consistent application. Dynamic linking between applications—Premiere to After Effects, Resolve to Fusion—enables sophisticated effects work without render delays or file management complications.
Proxy workflows allow smooth editing of high-resolution footage on moderate hardware by creating lower-resolution copies for editing, then conforming to original files for final export. This technique has become essential as cameras capture increasingly high-resolution footage that challenges even powerful editing systems. Modern editing software handles proxy creation and management automatically, making this workflow accessible to all editors.
Color Theory and Grading Excellence
Color correction and grading transform footage from flat, unpolished captures into visually cohesive, emotionally resonant images. Color correction addresses technical issues—fixing white balance, matching shots from different cameras or lighting conditions, and correcting exposure problems. This foundational work ensures visual consistency before applying creative grades.
Color grading adds mood and style, guiding viewer emotions through color psychology and cinematic aesthetics. Warm tones create comfort and nostalgia, cool tones suggest isolation or corporate environments, and contrasting color schemes draw attention and create visual interest. Study color work in films and high-end commercials to develop your aesthetic sensibility and technical approach.
Master color tools methodically: learn to read scopes (waveform, vectorscope, RGB parade) rather than relying solely on visual assessment, which varies across displays. Understand HSL (Hue, Saturation, Luminance) adjustments, curves for precise tonal control, and how to create custom LUTs (Look-Up Tables) that apply consistent grades across projects. Advanced techniques like secondary color corrections and power windows enable targeted adjustments that elevate your work significantly.
Audio Editing and Sound Design Fundamentals
Poor audio destroys viewer experience faster than mediocre visuals—audiences tolerate lower video quality but abandon content with bad sound almost immediately. Professional editors treat audio with the same attention as visuals, ensuring dialogue clarity, appropriate music beds, and sound effects that enhance rather than distract from storytelling.
Learn to clean audio using EQ (removing unwanted frequencies), compression (evening out volume levels), de-essers (reducing harsh 's' sounds), and noise reduction for eliminating background hum or hiss. Understand proper audio levels: dialogue typically sits at -12dB to -6dB, sound effects at -18dB to -12dB, and music beds at -20dB to -18dB, adjusted contextually based on content and delivery platform requirements.
Sound design involves layering ambient sounds, foley effects, and transitional audio that creates immersive experiences. Simple additions—room tone underlying dialogue, subtle whoosh sounds accompanying graphics, or environmental ambience matching locations—dramatically improve production value. Free sound libraries like Freesound.org and premium options like Epidemic Sound or Artlist provide extensive effect collections for professional projects.
Storytelling Through Editing Rhythm
Technical proficiency means nothing without storytelling ability. Professional editors serve as visual narrators who shape raw footage into compelling stories through pacing, shot selection, and emotional timing. The same footage can be edited multiple ways—fast and energetic, slow and contemplative, or dynamically varied—each creating different viewer experiences and serving different narrative purposes.
Study pacing in successful content across genres: action films use rapid cuts building tension, documentaries allow moments to breathe for emotional impact, and comedy timing relies on precise cut placement for maximum humor. Analyze how editors use establishing shots to orient viewers, cutaways to cover edits and add context, and reaction shots to build emotional connections with characters.
Develop instincts for rhythm by editing to music, where beats and musical structure provide clear pacing frameworks. This practice trains your ear and eye to recognize rhythm in dialogue and action, improving your editing of non-music content. Your intuition for when cuts feel right develops through extensive practice and critical analysis of your own work—watch your edits fresh after time away, noting where pacing drags or feels rushed.
Professional Workflow and Project Management
Organizing Media for Efficient Editing
Professional organization prevents wasted time searching for clips and enables quick responses when clients request revisions. Establish consistent folder structures: organize by shoot day or location, with subfolders for video, audio, graphics, music, and exports. Use clear, descriptive naming conventions that identify content at a glance—"Interview_Subject_CU_Take3" communicates more than "Clip0045."
Create bins or folders within your editing software, mirroring your file structure. Tag or color-code clips by content type, quality, or usage to speed up selection during editing. Many editors create selects bins containing only their best takes, eliminating the need to sort through all footage repeatedly while building sequences.
Modern editing software offers metadata tagging and search functionality that dramatically accelerates finding specific shots. Invest time adding descriptive metadata during ingest—the few minutes spent tagging save hours during editing. For large projects or documentary work with extensive footage, dedicated media management solutions like Kyno or Post Haste provide powerful organization tools beyond what editing software includes.
Developing Efficient Editing Techniques
Speed comes from systematic approaches, not frantic rushing. Assemble rough cuts quickly without worrying about perfection—get the story structure established first, then refine pacing, improve transitions, and polish details. This approach prevents getting stuck perfecting individual moments before understanding how they function within the complete narrative.
Learn keyboard shortcuts extensively—they eliminate time-consuming menu navigation and mouse movements. Custom shortcuts for your most-used functions further accelerate workflows. Most professional editors rarely touch their mouse during actual cutting, using keyboard-driven workflows that dramatically increase editing speed once muscle memory develops.
Create templates for recurring project types—title templates for consistent branding, adjustment layer presets for common effects, and sequence settings for different delivery formats. These reusable elements save setup time on every project while ensuring consistency across your work. Build a personal library of effects presets, transitions, and color grades that define your style and speed up production.
Client Communication and Revision Management
Clear communication prevents misunderstandings that waste time and damage client relationships. Establish project scope, deliverables, revision limits, timelines, and payment terms upfront. Use contracts or detailed emails confirming all agreements—verbal understandings fail when memories differ about what was promised.
Share rough cuts at strategic points for client feedback rather than waiting until you believe the edit is perfect. Early feedback catches major issues before you've invested hours in polish, preventing complete re-edits when client vision diverges from yours. Use review platforms like Frame.io that enable timestamped comments, eliminating ambiguous "I don't like it" feedback.
Handle revisions systematically: duplicate sequences before making requested changes, preserving your original edit in case the client reverses course. Document all changes in version notes so you can track what modifications were made and when. Set reasonable revision limits (typically 2-3 rounds) in your contract to prevent endless tweaking that destroys your effective hourly rate.
Advanced Techniques That Define Professional Work
Motion Graphics and Visual Effects Integration
Basic cutting alone rarely justifies premium pricing in competitive markets. Motion graphics—animated titles, lower thirds, logo animations, and kinetic typography—add production value that clients notice and compensate for. After Effects is the industry standard for motion graphics, offering powerful tools for creating everything from simple text animations to complex visual effects.
Start with fundamental motion graphics: learn to animate text properties (position, scale, rotation, opacity), create smooth easing curves for natural movement, and design lower thirds that enhance rather than distract from content. Study successful motion design to understand principles like anticipation, overshoot, and secondary animation that make graphics feel polished and professional.
Visual effects like green screen keying, motion tracking, and compositing expand service offerings beyond basic editing. While VFX specialization requires years of dedicated practice, basic competency in common effects allows you to handle client requests internally rather than outsourcing work and reducing your margins. Plugins like Red Giant Universe or Boris FX provide powerful effects with easier learning curves than building everything from scratch.
Advanced Color Grading Workflows
Professional colorists use systematic approaches that ensure consistency and efficiency. Start with balance—correcting white balance and exposure across all clips establishes a neutral foundation. Then match shots so similar scenes have consistent looks before applying creative grades. This methodical approach prevents the inconsistent results that plague editors who jump directly to stylizing individual clips.
Learn to use adjustment layers or nodes for non-destructive grading that enables easy revision. Create custom LUTs from your favorite grades, allowing you to apply signature looks quickly across projects. Study how professional colorists use masking and tracking to isolate and adjust specific areas—brightening faces, enhancing skies, or drawing attention to key elements within frames.
Color for different deliverables requires understanding: web content needs punchy, high-contrast grades that read well on various devices and screen qualities, while broadcast work must meet technical specifications (legal levels, safe colors) that prevent issues during transmission. HDR grading opens creative possibilities but requires proper monitoring equipment and understanding of how expanded dynamic range affects viewing experiences.
Audio Mixing for Professional Polish
Professional audio mixing transforms acceptable sound into immersive experiences. Create a methodical mixing approach: start with dialogue, ensuring clarity and consistent levels. Add music beds, adjusting levels so they support without overwhelming. Layer in sound effects and ambient audio that enhance realism and engagement. Finally, use master processing for overall polish and loudness compliance.
Room tone and ambient sound create realistic audio environments—silent gaps between dialogue sound unnatural and jarring. Record or source appropriate ambient sounds for every location, using them to smooth edits and create sonic consistency. This attention to audio detail immediately distinguishes professional work from amateur content.
Understand loudness standards for different platforms: broadcast content typically targets -24 LUFS, streaming platforms vary (-14 LUFS for YouTube, -13 to -15 for Spotify), and theatrical releases have different requirements. Use loudness meters rather than relying on peak levels, and apply limiters to prevent distortion while maximizing perceived volume. This technical knowledge ensures your content sounds professional across delivery platforms.
Comparison: Professional Video Editing Software
| Software | Price | Best For | Learning Curve | Platform | Key Strengths |
|---|---|---|---|---|---|
| Adobe Premiere Pro | $20.99-$54.99/month | Industry standard work | Moderate | Win/Mac | Creative Cloud integration, extensive plugins, universal compatibility |
| DaVinci Resolve | Free / $295 (Studio) | Color grading, budget-conscious | Moderate-Steep | Win/Mac/Linux | Professional color tools, all-in-one solution, one-time payment |
| Final Cut Pro | $299.99 (one-time) | Mac users, fast turnaround | Moderate | Mac only | Optimized performance, magnetic timeline, background rendering |
| Avid Media Composer | $23.99/month or $299/year | Film/TV post-production | Steep | Win/Mac | Industry standard for film/TV, collaborative workflows, media management |
| HitFilm Pro | $349.99/year | VFX integration | Moderate | Win/Mac | Built-in VFX tools, good value, growing user base |
Building Your Professional Editing Career
Creating a Portfolio That Attracts Clients
Your portfolio is your primary marketing tool, demonstrating capabilities more effectively than any resume or description. Include 5-8 diverse pieces showcasing different editing styles and project types: a narrative piece demonstrating storytelling ability, a commercial showing tight pacing and polish, a documentary segment proving your ability to craft authentic moments, and creative projects displaying artistic range.
Host portfolios on professional platforms like Vimeo (for quality playback and presentation), Behance (for design-focused audiences), or personal websites (for complete control over presentation). Include concise descriptions explaining project goals, your specific contributions, and any technical or creative challenges you solved. Clients care less about technical specifications than about the results you delivered and the problems you solved.
Update portfolios regularly, removing weaker early work as skills improve. Quality absolutely trumps quantity—five exceptional pieces carry more weight than fifteen mediocre samples. If lacking professional work initially, create spec projects demonstrating skills: edit trailers for existing films, reimagine music videos, or produce concept pieces for fictional brands. Clearly label these as personal projects rather than misrepresenting them as commissioned work.
Finding Clients and Building Your Business
Freelance platforms like Upwork, Fiverr, and Freelancer.com provide accessible entry points for new editors to build experience and portfolios. Initial success requires competitive pricing to build reviews and credibility, then gradually increasing rates as reputation strengthens. Many editors supplement platform work with direct clients found through networking, providing more stable income and better rates.
Network relentlessly within your local creative community and online spaces. Join editing groups on Facebook and Reddit, participate in forums, attend industry events (in-person and virtual), and engage authentically with other creators. Many opportunities arise through relationships and referrals rather than formal job postings—your network becomes your net worth in creative industries.
Cold outreach to potential clients works when done thoughtfully. Identify businesses or creators whose content could benefit from professional editing, research their current work, and craft personalized pitches explaining specific ways you could add value. Generic mass emails rarely succeed, but targeted, thoughtful outreach demonstrating genuine understanding of potential clients' needs generates responses and opportunities.
Pricing Your Services Appropriately
Price based on value delivered, not just time invested. Inexperienced editors often underprice dramatically, damaging both their income and the market for other editors. Research market rates in your area and for your experience level—entry-level editors might charge $25-$50/hour or $100-$500 per project, while experienced professionals command $75-$150+/hour or $1,000-$10,000+ per project, depending on complexity and client budgets.
Consider different pricing models: hourly rates work for unpredictable revision-heavy clients, project rates suit well-defined scopes, and retainer arrangements with regular clients provide stable income. Track time spent on projects initially to understand your effective hourly rate—this prevents accepting seemingly lucrative projects that actually pay poorly once all revision time is factored.
Don't compete on price alone—race-to-the-bottom pricing attracts problem clients who prioritize cost over quality, demand endless revisions, and provide poor testimonials, damaging your reputation. Price appropriately for your skill level, deliver exceptional value and service, and attract clients who appreciate professional work and compensate fairly. Raising rates regularly as skills improve is expected and necessary for sustainable creative businesses.
Continuous Learning and Skill Development
Professional editing requires continuous learning—software updates constantly, techniques evolve, and client expectations rise as production quality improves industry-wide. Dedicate time weekly to learning new skills, exploring software updates, and analyzing excellent editing work to understand what makes it effective.
Follow industry leaders, watch tutorials from experienced editors sharing insights, and study films and content across genres with an editor's critical eye. Understand not just what techniques were used but why they serve the story and how you might apply similar approaches to your projects. This analytical viewing develops your editorial instincts and expands your technical toolkit.
Invest in courses, workshops, or mentorship when opportunities align with your development needs. While free resources abound, paid education from experienced professionals often provides structured learning paths and personalized feedback that accelerates development. Consider these expenses as investments in your career that pay returns through improved skills, efficiency, and the ability to charge higher rates.
Common Mistakes to Avoid in Professional Video Editing
Over-Editing and Creative Excess
Inexperienced editors often over-edit, cramming in every transition, effect, and technique they've learned, regardless of whether it serves the story. Professional editing shows restraint—using effects purposefully rather than gratuitously. Every edit, transition, and effect should have a reason for existing beyond "because I could." Minimalism often communicates more effectively than complexity.
Watch your edits fresh after time away—this distance helps you identify unnecessary flourishes that seemed clever during editing but actually distract from your story. Test removing questionable elements; if the story works better without them, cut them. This discipline strengthens your work and develops editorial judgment that distinguishes professional editors from amateurs.
Trust your audience's intelligence and attention. You don't need constant motion, rapid cuts, or flashy effects to maintain engagement if your story and pacing are solid. Quiet moments, simple cuts, and letting shots breathe often create more powerful viewer experiences than relentless energy. Learn when to energize and when to let moments land.
Neglecting Audio Quality
Many editors focus exclusively on visuals, treating audio as an afterthought. This approach produces amateur results regardless of visual quality. Audiences forgive imperfect visuals but abandon content with poor audio almost immediately. Professional editors treat audio as equally important as visuals, dedicating substantial time to cleaning, balancing, and enhancing sound.
Invest in quality monitoring equipment—you can't fix what you can't hear accurately. Learn to use audio tools methodically rather than randomly adjusting controls, hoping for improvement. Develop systematic mixing approaches that ensure consistent quality across all projects. If audio isn't your strength, consider collaborating with audio specialists or investing significant time developing these crucial skills.
Ignoring Delivery Specifications
Different platforms have different technical requirements. Export settings appropriate for YouTube may cause issues for Instagram, and broadcast deliverables require completely different specifications than web content. Professional editors understand delivery requirements before starting projects, ensuring final exports meet technical specifications without requiring last-minute re-exports that delay delivery.
Create export presets for common deliverables—YouTube uploads, Instagram posts and stories, broadcast masters, web streaming, and archival copies. This systematization prevents errors and saves time on every export. When working with new platforms or unusual requirements, research specifications thoroughly rather than guessing—a few minutes of research prevents hours of troubleshooting rejected deliverables.
Poor File Management and Backup Practices
Lost projects or corrupted files can destroy businesses and reputations. Professional editors implement robust backup systems: automatic versioning within editing software, regular backups to external drives, and cloud backups for critical projects. The 3-2-1 rule provides good baseline protection: 3 copies of data, on 2 different media types, with 1 copy off-site.
Develop consistent file naming and folder structures that enable the quick location of any asset months or years later. When clients request revisions to old projects, you need to find and reopen them quickly. Poor organization wastes time hunting for files and creates unprofessional experiences when you can't efficiently address client requests.
FAQ: Professional Video Editing
What's the best software for professional video editing?
Adobe Premiere Pro is the industry standard with universal compatibility. DaVinci Resolve offers professional capabilities free, ideal for beginners. Final Cut Pro provides optimized performance for Mac users. All three deliver professional results—choose based on your platform, budget, and career goals.
How long does it take to become a professional video editor?
Basic competency develops in 3-6 months of dedicated practice. Professional-level skills emerge after 1-2 years of diverse project experience. However, continuous learning is essential—professional editors refine their craft throughout their careers.
What computer specs do I need for professional video editing?
Minimum: Intel i7/Ryzen 7, 32GB RAM, RTX 3060 GPU, 1TB NVMe SSD. For 4K+: i9/Ryzen 9, 64GB RAM, RTX 3080+, 2TB SSD. Prioritize RAM and SSD speed for best editing performance. Upgrade components gradually as earnings grow.
How much should I charge for video editing services?
Beginners: $25-$50/hour or $100-$500/project. Intermediate: $50-$100/hour or $500-$2,000/project. Experienced: $75-$200+/hour or $2,000-$10,000+/project. Price based on value delivered, your skill level, and local market rates.
Do I need a degree to become a professional video editor?
No formal degree is required—many successful editors are self-taught through online resources and practice. Build a strong portfolio demonstrating your abilities. Clients and employers prioritize what you can do over credentials.
What's the difference between color correction and color grading?
Color correction fixes technical issues like white balance and exposure for consistency. Color grading is creative styling that adds mood through color choices. Always correct before grading—both skills are essential for professional work.
Conclusion: Your Journey to Professional Video Editing Excellence
Professional video editing combines technical proficiency, artistic sensibility, and systematic workflows that transform raw footage into compelling stories. Success requires continuous learning, investment in appropriate tools, and commitment to consistent quality. The path demands patience and practice, but offers creative fulfillment, flexible career opportunities, and the satisfaction of bringing stories to life.
With powerful free software, abundant learning resources, and global client access, the barrier to entry has never been lower. Standing out requires developing unique creative voices, efficient workflows, and professional business practices. Focus on building genuine expertise, and your editing career will grow sustainably.


